Showing posts with label Refurbishment. Show all posts

Thursday, 1 July 2021

Interior decor

 The boss said that the interior was now letting the improved exterior down 

So... all the doors came off, the cupboards were refurbished with some new interior woodwork where needed and everything was given a few coats of nice white and blue paint 

It does look a lot better I am sure that you will agree


Monday, 17 May 2021

Thanks to SteveParkers.Com for helping

Hmmm Having problems ...  

Here are some pictures for the really great team at steveparkers.com who are helping me solve a mystery 

This is the old oil cooler pipe lined up with the edge of the machine


A bit closer in 


And the other end showing a length to the corner of about 77cm 


Putting the other one I bought from another supplier you can see that when the one end is at the same point the other is a lot shorter


About 8 cm shorter... 


Monday, 10 May 2021

Le Rouge et le Noir (The Red and the Black)

OK it's actually pink and black. It's the colours of the two fluids that are coming from the area just inside the drivers side front wheel 

The first is power steering fluid and is coming from this which is the Adwest Steering box which I have just removed. 

There are a couple of things to note when doing this (which I learned the hard way) which are that the bolts holding the steering column in need to be fully removed in order to get that our and have room to manoeuvre this out, and the pipes on the top are most easily removed with a Crow Foot socket (something I had never used before). After that it's just a job of removing the bolts holding it in and separating the ball joint on the drop arm with a splitter... 

Copious amounts of the pink stuff are released when you take the pipes off so I'm glad not to have done this on the new drive at home 


The black is coming from this which is the oil cooler pipe leading to the oil cooler built into the radiator. It's a simple replacement item if you don't drop the O ring and have to scramble on the floor to find it


So back to the power steering box. It needed quite some effort to get the first part of it apart, and even more of the pink to pour out. Some corrosion where the seal has let some moisture in so it's needed some time with emery paper.


If you look on the left where the round seal is you will see a couple of marks we put on regarding where it is before we take it apart. We're doing this on all the sections as we go 


Something that I have noted again is how useless the Haynes and the Workshop manual both are when it comes to this type of job. There is simply not enough detail in them to see how anything is put together and is therefore taken apart. The best document for this (as has been for almost all the work done in 2020) has been the Defender Parts Catalogue a copy of which I have made available via the link (Warning if you are on limited data this is a 28Mb file!) 
 

Tuesday, 6 April 2021

Success !

 After all the trouble that the relatives of this little chap have caused it's time for some good news

BTW this is Cedric the Covid. He's not really dangerous because he's made out of wool if you had not guessed!

This is Katy sitting outside the MOT station waiting for the test.


And this is her at home having passed! :)


Given how much of her has been apart in the last few months and how much effort it has been to put her back together I have to admit being a little nervous that the tester would spot something I had missed. So I was really pleased to get a pass certificate with just one minor advise on an item that had not been part of this work. 

As always a few minor things have been spotted after the shakedown cruise to home so she's actually going to stay up at the workshop for a short time longer whilst I do those (one of the minor points was a weeping oil cooler pipe) and then she will be properly home and allowed on the new drive and hopefully not drop any fluids on the new blockwork


Monday, 1 March 2021

New Glass, Peeling Skins

I've had some great news that the windscreen has been fitted. I did not think that I was up to that job so happily it was done for me by Paul and Mike two experts with a lot of years experience and who did a quality job in a very short time 


Its amazing how much having a windscreen in place really makes it look like the job is progressing well. There are loads of things that I can get on with now that's done, but before I can move ahead there is actually one more welding job (remember a couple of posts ago I said all the welding was done, actually I had forgotten something) 

The door bottoms were rotten and were causing some bimetallic corrosion and the only way to resolve that is to peel open the door skin, clean up pretty much everything. put in new door frame

Here it is part way through the process where the new frame has been put in by Steve the welder and given a quick coat of primer


After that it was a case of paint everything and then put the door skin back in place with sealant to ensure that there is a separation between the steel and the aluminium door skin. 

And then where there had been corrosion on the outer surface it had to be filled, sanded and repainted. 

Monday, 1 February 2021

Modern Art

One of the few things that I can get on with at home is cleaning up clips and parts for the roof rack which has been safely stored at home whilst the rest of Katy has been in the workshop being welded 

One of the more messy jobs was to prime and paint a set of clips to hold wooden walk rails onto the roof rack. 

I think that after 2 coats of primer and 2 coats of Hammerite and leaving that all to dry on a section of old plant seeding tray I've got quite an advanced piece of modern art (Land Rover style) 


Next stop the Turner prize methinks :)

Saturday, 30 January 2021

A New Hope

 Hmmm... I wonder where I've heard that before?

Well 2021 is a new hope in lots of ways, we have a new vaccine on the way and there is a lot of ex metal on the floor. Here for anyone who wants one is a self assembly kit for a Land Rover bulkhead 


It's actually "a new hope" because the fact that I am sweeping up means that the bulk of the cutting and shot blasting is done (otherwise there would be little point in any cleaning) and these are the remnants of the work that Steve the welding expert has done while I've been locked away from visiting. 

He's keen than I am able to get on for a while now, so has made sure that I can visit my half of his workshop in a socially distanced manner for a few visits now. Something that I am very grateful for and will take in a very responsible manner as and when I am able 

Thursday, 31 December 2020

2020 Review - What a year!

 What a year! 

It started with such optimism about getting out and visiting places and we had the Welsh Festival of Land Rovers to look forward to

I even got around in January to finishing off some of the Solar installation (however I'm still not happy with it this will be revisited in 2021 hopefully) 

Then of course in February we started hearing that there could be something nasty going around and we learned all about Covid-10. March came and the weather got better and we were still waiting for some clarity on what was going to happen and then as march was about to leave us we were all asked to stay at home and not meet up with anyone.

What an optimist I was.. 

April was when we started clapping and I thought it was fun to include Katy in some of the pictures, but I was so embarrassed about the way she looked 


that as May came along I know I thought give it a quick rub down with a sander, a coat of paint and it will be good to go when things free up in the summer. 

Soon everyone was debating whether to wear masks or not and it meant not a lot to me because during June I was wearing one for about 6 hours a day whilst sanding the multiple layers of paint off the roof and sides of Katy. 


I added the first coat of the new colour to the roof and I congratulated myself (I was so over optimistic!) and by July I was congratulating myself on getting the sides painted as well 


Things certainly moved on at pace that month because I got the rear step welded up and I moved her from our drive up to Steve's workshop where the really hard work could take place. By the end of that month she was devoid of wings, windscreen and we could see the real state of the sections that needed attention. 

In August the cutting started and I repaired the wings ready to go back again and then in September we managed to move her into the workshop proper (with the help of a Massey Ferguson industrial tractor and the cutting and welding could really get started. 


Welding started we had some good progress at first 


However, later in September we had "local lockdown" in  Wales with constraints against crossing county boundaries which was a disaster for the project because despite being only 2.5 miles away, Katy was in a different county. A lazy way to restrict things IMO by politicians, and a real nonsense because I was working mainly alone, could easily stay away from Steve because the workshop is a set of barns, but rules are rules and things went on hold :(

Towards the end of the year there was a brief opening of rules before we were locked down again. during that time I managed to rub down and ready for second coat some sections where Steve the welder wasn't working (social distancing managed at all times)  

So in summary 

Things are looking better on one corner where the welding has finished


but its still work in progress 


Sunday, 6 September 2020

Heavy Metal - Part 1

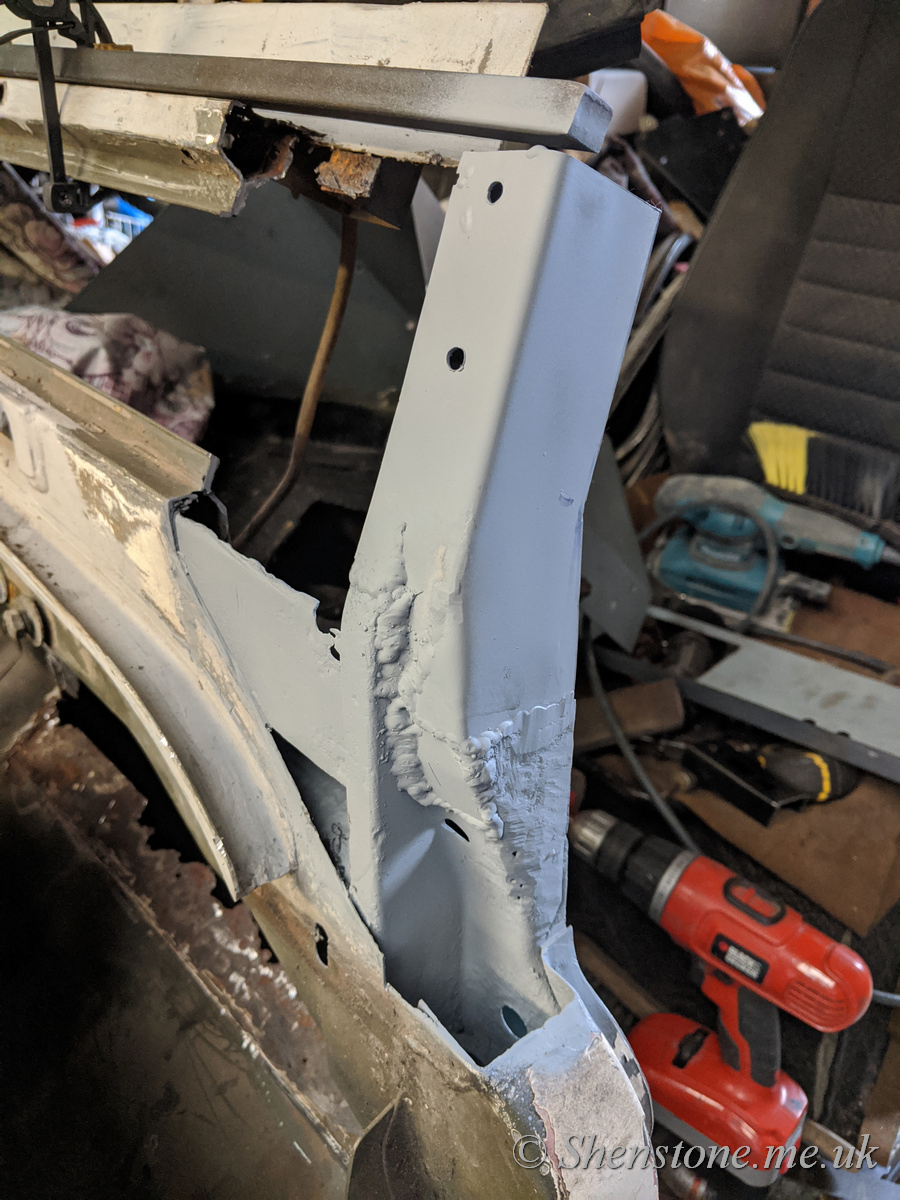
 Ok, it's just the start of one corner, but the rebuild has started properly now with some real metal going back in place of the fresh air and rust that was in this position just a couple of days ago. 


Just a quick spray of primer to keep any moisture away over the weekend and it will be back to it on Monday. There is a long way to go and a lot more to do before she will be back in one piece, but it's a positive step forwards


Friday, 21 August 2020

Cutting Corners

I knew that the corners were bad, but the full extent of the rust can only be seen when the inner panels have been cut off... 
It's actually a bit better than it looks because some of that is just surface rust and can be treated, but we will be replacing those bits with metal instead of "just air" which leaks when it rains

More panels are on route from P A Blanchard as I post this and we plan to get back to this next week 

Tuesday, 11 August 2020

Horror on the screen

OK, it's the bulkhead corners that are the horror (more later), but getting the screen out was no small adventure as it took much of the day to extract recalcitrant rusted screws and bolts out and to work trough finding all the small hidden ones that were still stopping things and then cutting through the seal on the 30 year old windscreen to bulkhead seal so that every thing would come out. 

This was the final result 

And then to truly explore the horror that needs to be sorted out here are some close ups of the bulkhead corners 


So tomorrow I will be returning to the scene of the horror and getting as much of the dash out as I can so that Steve the welder can do his magic


Monday, 10 August 2020

Wings waiting

After a strip down, some reshaping, prime and repainting the wings are waiting for the welding and then to go back on again

Friday, 31 July 2020

Katy naked

If that title doesn't get lots of hits on the interweb nothing will!

For those of you who came here not looking for Land Rover stuff.. sorry :)

I've watched loads of videos and read lots of things which said that it would take 1-2 hours to remove a wing. Well the driver side took me almost all of the working day due to my ineptitude and some information that did not get mentioned on any of the videos I watched. 

1. To get the top bolt out under the wing is a pain as most people say, but actually ignoring the advice of long bars on a socket ratchet and using a flexible ratchet spanner made it a lot easier

2. Having a long handled 13mm / 1/2 inch ring spanner was very useful for a couple of nuts

3. And this is the big one. The inner and outer wings have a gasket that glued them together so even when all the bolts were out they wouldn't separate until I prised them apart with a nailbar

Anyway success...


With the wings off I can see that the rot is not as bad as feared, but it needs doing

Another interesting features is the two tone airborne.. fabulous noise as you can hear on the video celebrating the NHS but here they are to see as well

Wednesday, 29 July 2020

Brushed Aluminium

As I am sure UK readers are aware it's Alumin-i-um... and people like it brushed on vehicles..

Katy's wings were covered with some old aluminium checker plate which was corroded and going to look really tatty compared to loads of nice new paint.

so I brushed it ..

Here's a before and after to see what about 30 minutes with a wire brush and steel wool will give you


And just to prove I wasn't going half hearted at this here is the finished job


Wednesday, 22 July 2020

Rivet Counter

Anyone who is in to Land Rovers will know the phrase"Rivet Counter". These are knowledgeable and generally helpful people who know everything that needs to be known and is happy to help check that the right thing has been used and of course the right number of rivets have been used (especially on a Series one).

I'm not one, I'm not enough of an expert especially on series Land Rovers. 

However today I have been counting them carefully and have got to the number 45 ... and what is even better is the rear step does not wobble and closes easier

Monday, 6 July 2020

My favourite corner shop is open again

It's been an interesting time this lockdown

I've been keeping busy which you can see on the posts that have already happened and I'm certain I will be doing more

Today I removed the bonnet to work on that. Four of the six bolts snapped off and those were the easy ones! 

The other two resisted the damaged screwhead tools that I have and had to be drilled out so new nuts and bolts would be needed. I decided to make use of the click and collect service at Bearmach and they were excellent as usual.

Glad to be supporting a local business


Saturday, 4 July 2020

Stoned at the back

first coat of the new light stone colour on the body work

The cupboard is going to be done as well, but needed some repairs first

Thursday, 25 June 2020

Primer backend

After an immense amount of sanding the body of the ambulance/camper area has made it into a corat of primer. 

I made a decision to not remove the gas cabinet and trim because I did not want to break the seal on areas that are not leaking 


The rear step has been taken away for some welding.. and the ladder has been removed I will see if I can find a smaller one whilst we have this opportunity


It's a bit of a pity that there are so many vent holes from old fridges, but they are there and they will stay because I don't want to risk any leaks taking them off


Sunday, 7 June 2020

Repainting Part 2 ... New colour on the roof

First view of the new colour on the roof. This is just the first coat and there is a lot more to go.

The preparation has been to sand with 40 and then 80 grit, then a thorough wash, wipe with panel wipe degreaser and a wipe with a tack cloth.

Then first coat of primer which shows up the imperfections so another round of sanding and cleaning.

Repeated the primer and another clean, and then this went on...

It's finally raining here so it's going to be paused for now


Wednesday, 27 May 2020

Repainting Part 1.. the stripping

Its time to deal with the old paintwork on Katy. it's had at least 4 different colour schemes when in service because I have photo's of it in NATO green and in UN white and there is definitely camouflage on it as well and then the cream current top coat. I've made a start on the work by removing the roof rack (with help from the boss) and am starting on the roof because less people will see that if I am not so good during practice


That can go on the patio.. who's going to need that for a party for a while …


Now you can see remnants of the original red cross, sadly not in good enough shape to be worth saving


Much of the paint is so badly attached it comes in sheets with a scraper. this is not usual for automotive paint so I suspect that the final cream coat is more of a house paint than what is normally on a vehicle which is typically harder


In places it just peels off to the original undercoat


Then it's my three new best friends


and I am getting something like this ... I'm considering stopping here where its well attached because it's been 2 full days work to get to this point and I think trying to get to bare metal all over will be beyond me given I will have to work ourside and in bouts of good weather..